Showing posts with label free amigurumi pattern. Show all posts

Amigurumi frog pattern


Frogs seems to be popular on internet these days. I've been seeing lots of cute frog illustrations and artworks on Instagram and Pinterest and wanted to make these frogs for quite some time. So today we'll see how to make an amigurumi frog. 

Amigurumi Elephant pattern


EDIT: I have updated this elephant pattern with no-sew legs on my new website

                                          CHECK OUT THE NEW PATTERN HERE

Valentine's day is just two days away, so here's a little valentine's gift from me to you. This little elephant works up quickly so you can make and gift it to your loved ones for Valentine's day. Let's head to the tutorial.

Pastel pusheen Amigurumi pattern


Post update 27/01/2022:
There's an updated version of this pattern with clear instructions and little changes to the tail  over on my new blog
                                             CHECK OUT THE NEW PATTERN

Do you like cats? I'm not much of a cat person but they hands down take the lead when it comes to cuteness. It's hard not to love these fluffy little furballs with big adorable eyes. I really loved making this chubby cat that i couldn't stop at just one. Let's see how to make these adorable chubby cats.

Amigurumi bunny free pattern

Bunnies are so cute, fluffy and reminds me of Spring time and Easter. With Spring upon us and Easter less than a month away, it's the perfect time to make this cute little Amigurumi Bunny :) Hope you will enjoy making this Bunny as much as i did. Read below for instructions.


Materials needed:
  • Acrylic yarn in pink color ( i have used 4ply/ sport weight acrylic yarn and 2mm crochet hook)
  • Little bit of green yarn for the bow
  • Crochet hook (according to the size of your yarn)
  • Poly fiber fill
  • Tapestry needle
  • 5 mm safety eyes or flat back black beads for eyes
  • Black embroidery thread   
This pattern is written in US English terms and worked in continuous rounds unless stated otherwise


ch - chain
sc - single crochet
st - stitch
sl st - slip stitch
dc - double crochet
trc - treble crochet
dec - sc 
2 together
rep ** - repeat stitches between **

Head: 
Using pink color yarn,
R1: 6 sc in magic ring (6)  
R2: 2sc in each st (12)
R3:  *sc in next st, 2 sc in next st*, rep **(18)
R4: *sc in next 2 st, 2sc in next st*, rep ** (24) 
R5: *sc in next 3 st, 2sc in next st*, rep ** (30)
R6: *sc in next 4 st, 2sc in next st*, rep ** (36)

R7-11: sc in each stitch (36)

R12: *sc in next 4 st, 1 dec  in next st*, rep ** (30)
R13: *sc in next 3 st, 1 dec in next st*, rep** (24)
R14: *sc in next 2 st, 1 dec in next st*, rep** (18)
R15: *sc in next st, 1 dec in next st*, rep** (12)
Stuff firmly and Fasten off leaving a tail for sewing

If using safety eyes, insert them between R10 and R11 with 6 sts in between.


Ears: (Make 2)
R1: 6 sc in magic ring (6)
R2: 2sc in each st (12)
R3: *sc in next st, 2 sc in next*, rep** (18)
R4: *sc in next st, dec 1 in next st*, rep** (12)
R5:  sc around (12)
R6: sc in next 2 st, dec 1 in nxt st*, rep** (9)
R7-8: sc in each st (9)
Fasten off, leaving a tail for sewing.

Arms: (Make 2)
R1: 6 sc in magic ring (6)
R2-7: sc around (6)
Fasten off leaving a tail for sewing.


Legs and body: 
R1: 6 sc in magic ring (6)
R2: *sc in next 2 st, 2sc in next*, rep ** (8)
R3-4: sc in each st (8) 
Fasten off the first leg. 
Make another leg in the same way but do not cut off the yarn and chain 4, join it to the first leg.
R5: sc around the 8 sts of first leg, sc in next 4 ch, sc in next 8 sts of second leg and sc in next 4 ch (24)
R6-11: sc around (24)
Stuff the legs and the body as you go.
R12: *sc in next 6 st, dec 1 in next st*, rep ** (21)
R13: *sc in next 5 st, dec 1 in next st*, rep ** (18)
R14: *sc in next 4 st, dec 1 in next st*, rep ** (15)
R15: *sc in next 3 st, dec 1 in next st*, rep** (12)
Finish stuffing and fasten off leaving a tail for sewing.

Bow:
In Magic ring, *ch 3,dc,trc,dc, ch 3, slip stitch into the ring*, rep **


Assembling:
Attach the body to the head.
Attach ears on the head ( i have attached both ears at the side and nearby for a cute look)
Attach the arms to the body.
Sew on the bow to the head.
And your little Bunny is ready! 
Make them and gift it to your loved ones this Easter. Have a great day everyone :)


Amigurumi unicorn free pattern


Hello everyone! recently i got an order for making some unicorns. On browsing Pinterest for some free pattern, i found most of them were rather large and i wanted mine to be smaller so that it can be used as key chain or bag charms. So i finally came up with a pattern of my own and i think it turned out pretty well. Read below for instructions.


Materials needed:
Acrylic yarns in white and pastel colors

Crochet hook according to the size of your yarn ( i used 3 mm  hook)
Black beads or safety eyes

Tapestry needle

Instructions:
The pattern is written in US terminology. This project is worked in continuous rounds unless stated otherwise
sc -single crochet
st- stitch
dec- one single crochet decrease
sl st - slip stitch


Head:

With main color,
R1: 6 sc in magic ring (6)
R2: 2sc in each st (12)
R3:  *sc in next st, 2 sc in next st* rep **(18)
R4: *sc in next 2 st, 2sc in next st*, rep ** (24) 

R5 - 11: sc in each stitch (24)
R12: *sc in next 4 st, dec 1 in next st*, rep **(20) 
R13: *sc in next 2 st, dec 1 in next st*, rep **(15) 
R14: *sc in next st, dec 1 in next st*, rep **(10) 

stuff firmly
R15:  sc dec in each stitch (5)

Fasten off leaving a long tail for sewing 

Body:
With main color
R1: 6 sc in magic ring (6)
R2: 2sc in each st (12)
R3:  *sc in next st, 2 sc in next st* rep **(18)

R4: *sc in next 5 st, 2 sc in next st* rep ** (21)
R5 - 11: sc in each stitch (21)
R12: *sc in next 5 st, dec 1 in next st*, rep **(18) 
R13: *sc in next st, dec 1 in next st*, rep **(12) 

stuff firmly
R14: sc dec in each stitch (6) 


Fasten off leaving a long tail for sewing 

Mane:
The mane is worked as 3 parts. Choose a secondary color of your choice and this will be the color for mane 1

Mane 1:
R1: 4 sc in magic ring (4)
R2: *sc in next st, 2 sc in next st* rep ** (6)
R3: *sc in next st, 2sc in next st* rep ** (9)
R4: *sc in next 2 st, 2 sc in next st* rep** (12)
R5-13: sc in each stitch (12)
stuff a small amount of fibre fill and close the opening by tapestry needle
Mane 2 and 3:
R1: 6 sc in magic ring (6)
R2: *sc in next 2 stitch, 2 sc in next* rep ** (8)
R3-8: sc in each st (8)
R9: *sc in next 2 st, dec 1 in next st* (6)
Fasten off and Sew in the edges .

Legs: (make 4)
start with secondary color
R1: 6 sc in magic ring (6)
 R2: *sc in next 2 stitch, 2 sc in next* rep ** (8)
switch to primary color
R3-4: sc in each st (8)

Ears: (make 2)
R1: 4 sc in magic ring (4)
R2: *sc in next st, 2 sc in next st* rep ** (6)
R3: *sc in next st, 2sc in next st* rep ** (9)

Horn:
R1: 4 sc in magic ring (4)
R2: sc in next 3 st, 2 sc in next st (5)
R3: sc in next 4 st, 2 sc in next st (6)
R4: sc in next 5 st, 2 sc in next st (7)

Tail:
Take 6 strands of yarn (2 strands of each colors used for mane)  about 20 cm each. Insert hook to the back of the body where you want the tail to be. Fold the strands into half and pull through all the strands by hook and again pull through the strands in the loop formed.


Assembling:
Attach head slightly slanting to one end of the body (like in the pic below)
Add the mane 1 to the head and other two mane parts below mane 1
Attach 4 legs to the body and ears at each side of the mane
Attach the horn to mane 1


Also check out Unicorn macaroon pattern if you want to make a quick unicorn project. Hope you like it and enjoy making them as much as i did. Have a cheerful day! Hugs :)

Unicorn macaron amigurumi pattern


Embrace your uniqueness, believe in miracles and sparkle from within..
Unicorns are the first thing that comes to my mind when i read this quote. Unicorn fever is catching up all over the world and doesn't look like it will fade anytime soon. So today I've come up with a pattern on how to make Unicorn macaron amigurumi. Let's head on to the pattern..


Materials needed:
  • Acrylic yarn in white, pink,blue and violet and light brown colors
  • Crochet hook according to the size of your yarn
  • Embroidery thread in black
  • Felt in black color for the eyes (optional)


This project is worked in continuous rounds unless stated otherwise
sc -single crochetst- stitch
sl st - slip stitch


Macaron: (Make 2)
R1: 6 sc in magic ring (6)  
R2: 2sc in each st (12)
R3:  *sc in next st, 2 sc in next st* rep **(18)
R4: *sc in next 2 st, 2sc in next st*, rep ** (24) 
R5: *sc in next 3 st, 2sc in next st*, rep ** (30)
R6: *sc in next 4 st, 2sc in next st* rep ** (36)
R7: sc in each st (36)
Switch to blue or pink color
R8: working in back loops only, sc in each stitch (36)

Sew the roses on the head and embroider the eyes and mouth before joining both the pieces


Edit: 

I have made a little changes to Roses and Horn. Hope it'll help you make Macaron with better results. 
For rose: (make 3)
Using pink yarn, 
Chain 16,
Slip stitch in second chain from hook and slip stitch in all the remaining chains. 
Roll from one end to other like we do for deco rose and stitch them in place when you are satisfied with the arrangement.
Make roses similar to the above using blue and violet color yarns.

For ears: (make 2 )

R1: 4 sc in magic ring (4)
R2: *sc in first st, 2sc in next st* rep ** once (6)
R3:  *sc in first st, 2 sc in next st* rep ** twice (9)
R4: sc in each stitch (9)

Horn (make 1)

R1: 4 sc in magic ring (4)
R2:  *sc in first 3 st, 2 sc in next st (5) 
R3: sc in first 4 st, 2 sc in next st (6) 
R4: sc in first 5 st, 2 sc in next st (7)
R5: sc in first 6st, 2 sc in next st (8)
R6: sc in first 7 st, 2sc in next st (9)


Joining:

For joining the macarons, with blue or pink yarn (that you've chosen for the filling) slip stitch in the back loop of the top macaron filling part (blue here) with the front loop of the bottom half of the macaron filling, start stuffing with poly fibre fill when you're three fourth done closing the macaron and continue stuffing a little till the end. 

Assembling:

Attach horns and ears to the finished macarons and you can also add black felt pieces cut in small rounds for the eyes. 


I also have another important anouncement to make. After lots of thinking and procrastination, i've finally opened my etsy shop (yay!) Although i'm still new and trying to grasp everything about etsy, i do hope you will check out my Etsy shop Currently there are only few listings and i have intended to add more items very soon :)


May you have a magical and sweet day by making these cute little unicorn macarons..


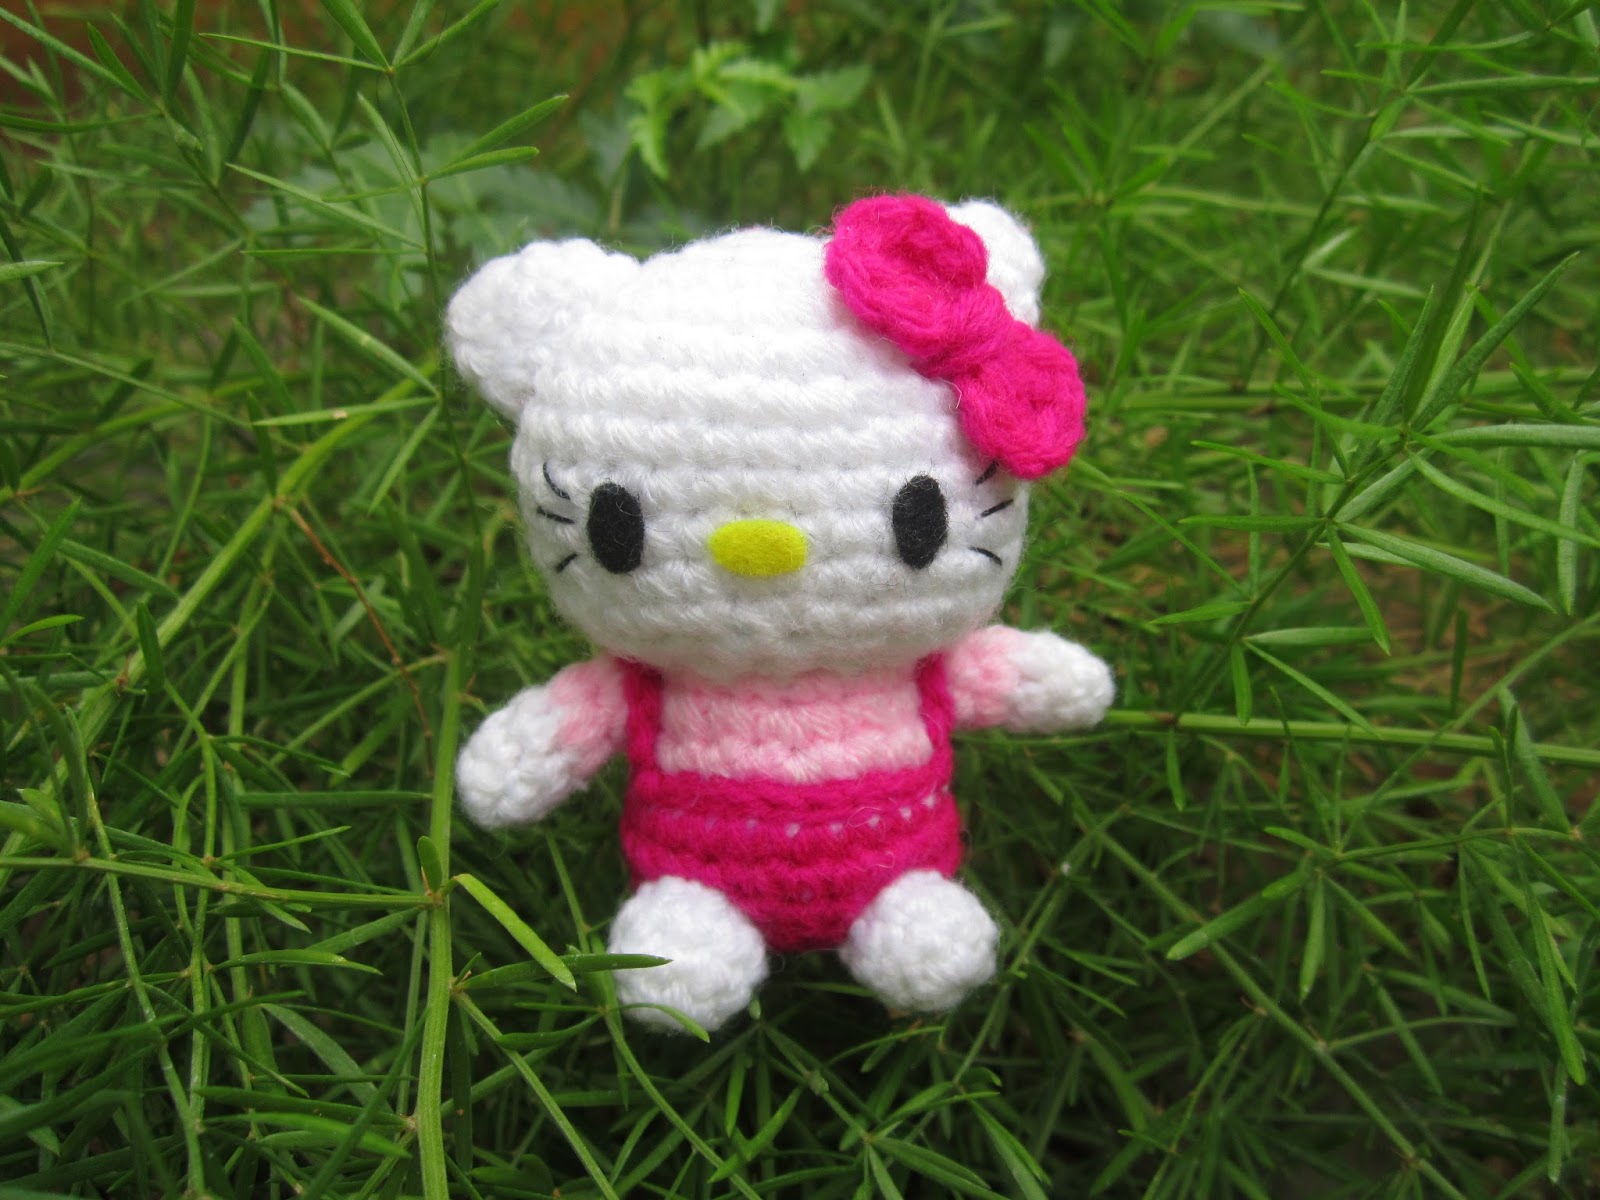
Hello Kittty amigurumi pattern

Hello friends! I'm finally back after two months of cramming for my exam. I'm happy to be back and missed blogging and reading all your posts so much. I'll definitely catch up with you all soon.
I'm a big fan of kawaii characters in general and Hello kitty comes on top as one of my favorites. I really wanted to create a mini amigurumi version of hello kitty and happy with the way it turned out. Here's the pattern to amigurumi hello kitty if you guys like to make one too.


Materials needed:
Acrylic yarn in white, light and dark pink colors
Crochet hook according to the size of your yarn
Little piece of black felt (for eyes) and yellow felt (for mouth)

Black embroidery floss
Tapestry needle


Instructions:
This project is worked in continuous rounds unless stated otherwise
sc -single crochet
st- stitch
dec- one single crochet decrease
sl st - slip stitch

Head and body:
R1: 6 sc in magic ring (6)
R2: 2sc in each st (12)
R3:  *sc in next st, 2 sc in next st* rep **(18)
R4: *sc in next 2 st, 2sc in next st*, rep ** (24) 

R5: *sc in next 3 st, 2sc in next st*, rep ** (30)
R6-10: sc in each stitch (30)
R11: *sc in next 3 st, dec 1 in next st*, rep **(24) 

R12: *sc in next 2 st, dec 1 in next st*, rep **(18) 
R13: *sc in next st, dec 1 in next st*, rep **(12) 
stuff the head firmly with fiberfill and switch to pink color 
R14: sc in each stitch (12)
R15:  *sc in next st, 2 sc in next st* rep **(18)
R16: *sc in next 2 st, 2sc in next st*, rep ** (24) 

switch to dark pink color
R17-19: sc in each stitch (24)
R20: *sc in next 2 st, dec 1 in next st* rep ** (18) 
R21: *sc in next st, dec 1 in next st*, rep ** (12) 
stuff firmly
R22: sc dec in each st (6) Fasten off.

Optional: surface crochet with slip stitch at R17 with dark pink color for a neat finish.

The tutorial on how to surface stitch is available here

Dress strap: (make 2)
With dark color pink chain 8 or the desired length leaving a long tail for sewing on both ends to the trousers at R17.

Legs: (Make 2)
with white color yarn, 
R1: 8sc in magic ring (8)
R2-3: sc in each stitch (8)
fasten off  and leave a tail for sewing


Hands: (Make 2)

with white color yarn
R1: 6sc in magic ring (6)
R2-3: sc in each stitch (6)

Switch to pink color
R4-5: sc in each stitch (6)
Fasten off leaving a long tail for sewing.


Ears: (Make 2)
R1: 6sc in mc 

R2: *sc in next st, 2 sc in next st* rep (9)
R3: *sc in next 2 st, 2 sc in next st* rep (12)
Fasten off leaving a long tail for sewing. 


Hairbow:
In a magic ring, ch 1,hdc,dc,trc,dc,hdc,ch 1, slipstitch and again sc,hdc,dc,trc.dc.hdc,sc and close the ring. Wind the yarn around the bow three or four times and attach it to the head

Assembling:
Attach the ears to the head and attach hands and legs to the body. 
With tapestry needle sew the dress strap to the bottoms at Row 17.
Attach the bow at the head.
Use small pieces of black felt for eyes and a small yellow piece for nose. You can also embroider the eyes.
Finally embroider whiskers using black embroidery floss.


Now your hello kitty is ready! Hope you guys like this pattern and enjoy making them as much as i did.


valentine birds amigurumi pattern


Hello lovely people! February has began and the first thing that comes to mind about February is valentine's day. Giving a handmade present to your loved ones on this occasion is more apt and cherished than buying gifts from outside. So why not make these little birdies to express your love. Here's the pattern on how to make valentine's birds.


 Materials needed: 
Acrylic yarn in light and dark pink
Crochet hook according to the size of your yarn
Safety eyes or beads for eyes
Tapestry needle
A little yellow felt for beak
Poly fibrefill for stuffing

This project is worked in continuous rounds unless stated otherwise
sc -single crochetst- stitchdec- one single crochet decreasesl st - slip stitch
dc - double crochet
tr - treble crochet 

 Instructions:
 Head and body:
R1: 7 sc in magic ring (7)  
R2: 2sc in each st (14)   
R3:  *sc in next st, 2 sc in next st* rep **(21)  
R4: *sc in next 2 st, 2sc in next st*, rep ** (28) 
R5-R12: sc in each stitch (28)
R13: *sc in next 2 st, dec 1 in next st*, rep **(21) 
R14: *sc in next st, dec 1 in next st*, rep **(14) 

stuff firmly with poly fiber fill
R15: sc dec in each stitch (7)
Fasten off 

 Wings/Hands and legs (make 4)
In magic ring, chain 2, 4dc, chain 2 and sl st into the magic ring and close it.
Fasten off leaving a long tail for sewing.

 Heart:
In magic ring ch 4, 3 tr, 3 dc, ch 1, 1 tr, 3 dc, ch 3 and join with the sl st into the ring and close it tight.
Fasten off leaving a long tail for sewing.

 Bow (for female birdie)
In magic ring, ch 1, dc,ch 1 and sl st into the ring and again ch 1, dc, ch 1 and sl st into the ring and close it. wrap some yarn around the centre and leave a long tail for sewing

 Hat (for male bird)
7 sc in magic ring (7)
2 sc in each st (14)
working on backloops only,
sc in each stitch (14)
fasten off leaving a tail for sewing.


Assembling:
Attach the heart in the centre of the bird. Stitch wings/hands of the bird as if it's holding the heart
Attach legs at the bottom. and bow/hat at side of the head.
Place two black beads for eyes. Embroider a little lashes for female bird.
Cut a small over shape yellow felt and paste it for beak.


Hope you guys like the pattern. Wishing you all a fantastic february! Cheers:)

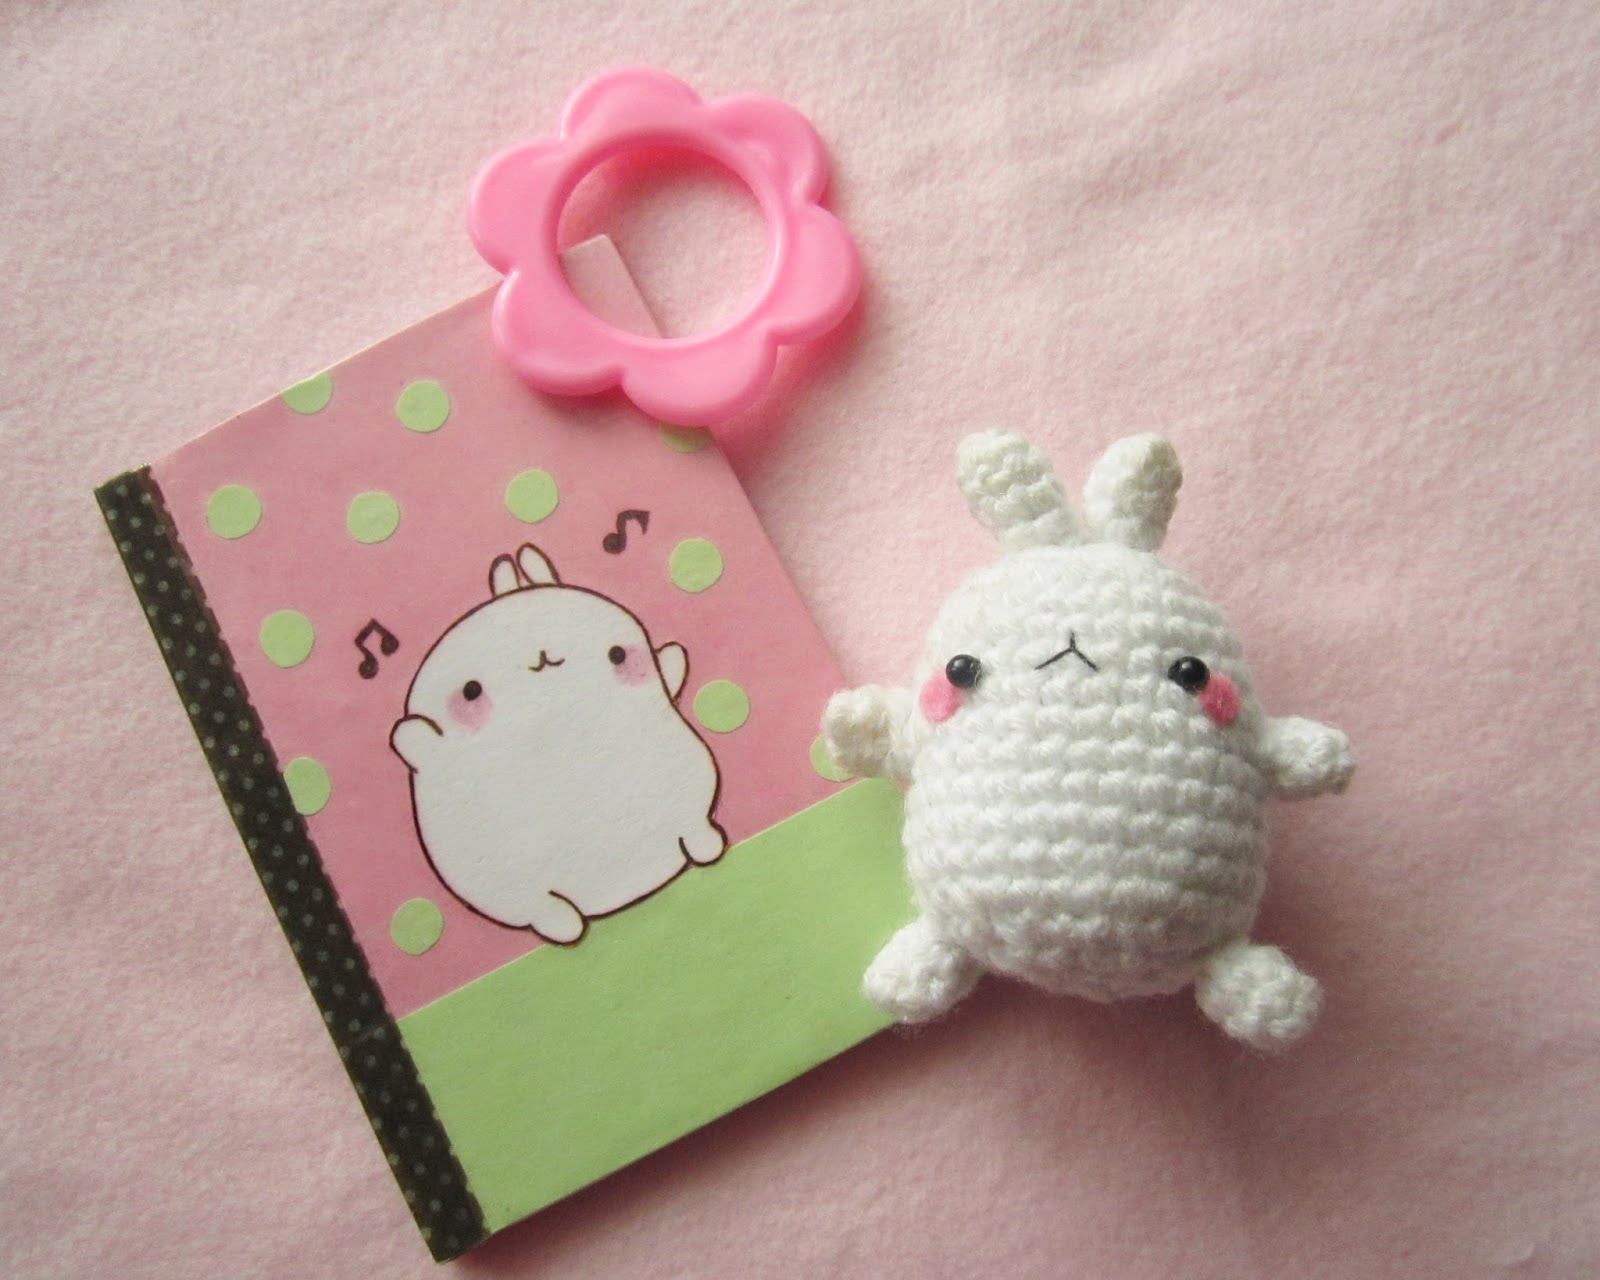
Molang Bunny free pattern

                                          It's the most wonderful time of the year..!!

December will always remain as my favorite month of the year. It's the season of joy and celebration. Christmas is all about sharing and spending time with your loved ones. It is also the time to show your love by giving presents to ones that truly matters. Here is a little Christmas Molang bunny pattern for you guys as a little Christmas present from me.


 Materials needed:
Acrylic yarn in white, red and green color
Crochet hook according to the size of your yarn
Black beads for eyes
Embroidery floss for mouth
Tapestry needle

This project is worked in continuous rounds unless stated otherwise
sc -single crochet
st- stitch
dec- one single crochet decrease
sl st - slip stitch

hdc - half double crochet

Head and body:
R1: 7 sc in magic ring (7)
R2: 2sc in each st (14)
R3:  *sc in next st, 2 sc in next st* rep **(21)
R4: *sc in next 2 st, 2sc in next st*, rep ** (28) 

R5-9:: sc in each stitch (28)

Switch to red color
R10-13: sc in each stitch (28)
Switch to white color
R14: sc in each stitch (28)  
R15: *sc in next 2 st, dec 1 in next st*, rep **(21) 

R16: *sc in next st, dec 1 in next st*, rep ** (14) 
stuff firmly
R17: sc dec in each st (7)Fasten off.

Hands: (make 2)

with white color yarn
R1: 5sc in magic ring (5)
R2: sc in each stitch (5)
switch to red color
R3: sc in each stitch (5)

 Legs: (make 2)
with white color yarn
R1: 5sc in magic ring (5)
R2-3: sc in each stitch (5)
 
Ears (Make 2)

R1: 6 sc in magic ring (6)
R2-4: sc in each stitch (6)

For shawl:
With grenn or red color yarn, ch 56.
Hdc in second chain from hook and Hdc in each of the foundation chains. 
Fasten off and weave in the ends
 

Assembling: 

Join hands, legs and ears to the body.
Add in black beads for eyes between row 7 and 8.
Embroider the mouth using black thread.
Add blush using little pink felt.
Wrap the shawl around the neck.
Your little Christmas molang is done! 


You can turn this into a cute christmas ornament by adding a little string at the head.


Hope you guys like making this. Cheers


Amigurumi Panda free pattern

Hello lovelies! Thanks for all the love you've shown to my Amigurumi teddy pattern. It's a joy to see people make amigurumi dolls out of that pattern and inspires me to create more. Today i'm here with a panda couple pattern. Head over below for instructions.


Materials needed:
Acrylic yarn in black and white colors
Crochet hook according to the size of your yarn
Little piece of black felt (for eyes and mouth) and pink or red felt (for bows)

Tapestry needle

This project is worked in continuous rounds unless stated otherwise
sc -single crochet
st- stitch
dec- one single crochet decrease
sl st - slip stitch

Head and body:
R1: 7 sc in magic ring (7)
R2: 2sc in each st (14)
R3:  *sc in next st, 2 sc in next st* rep **(21)
R4: *sc in next 2 st, 2sc in next st*, rep ** (28) 

R5: *sc in next 3 st, 2sc in next st*, rep ** (35)
R6-10: sc in each stitch (35)
R11: *sc in next 3 st, dec 1 in next st*, rep **(28) 

R12: *sc in next 2 st, dec 1 in next st*, rep **(21) 
R13: *sc in next st, dec 1 in next st*, rep **(14) 
stuff the head firmly with fiberfill and switch to black color 
R14: sc in each stitch (14)
R15:  *sc in next st, 2 sc in next st* rep **(21)
R16: *sc in next 2 st, 2sc in next st*, rep ** (28) 

switch to white color
R17-18: sc in each stitch (28)
R19: *sc in next 2 st, dec 1 in next st*, rep ** (21) 
R20: This step is optional. If you want a rounded body skip to R21. If you want your panda to sit then sc in back loops of each stitch (21) 
R21: *sc in next st, dec 1 in next st*, rep ** (14) 
stuff firmly
R22: sc dec in each st (7)Fasten off.

Legs: (Make 2)
R1: 7sc in magic ring (7)
R2-3: sc in each stitch (7)
fasten off  and leave a tail for sewing


Hands: (Make 2)
R1: 5sc in magic ring (5)
R2-3: sc in each stitch (5)
Fasten off leaving a long tail for sewing.


Ears: (Make 2)
R1: 6sc in mc 

R2: 2sc in each stitch (12)
R3: sc around (12)
Fasten off leaving a long tail for sewing.

Assembling: 
Attach both hands and legs to the body using tapestry needle.
Sew in both ears to the head.
Cut and paste a small black felt for eyes and nose in the head. 

Add a little felt or crocheted bows to the head (for female panda) or neck (for male panda)


Hope you guys like it. Have fun creating :)
Update cookies preferences