Showing posts with label kawaii. Show all posts

DIY headphone holder

Hello lovely people! can't believe we are halfway through 2017 already! It's summertime and most of my Instagram feeds are loaded with summer themes and watermelon comes on top of it. Be it a food, toy or accessories, watermelon theme is seem to be on rage now. I think the vibrant colors of watermelon clearly depicts the radiance of summer. So here's a little Diy on how to make a watermelon headphone holder.


Materials Needed:
Acrylic yarn in red and green colors
Crochet hook according to the size of your yarn
Black and pink felt pieces (for eyes) or embroidery thread.
Snap fastner

sl st- slip stitch
dc - double crochet
ch - chain

Instructions:
(With Red yarn)
R1: In a magic ring, chain 3 (count as dc) and 11 dc and sl st at the top of chain 3 (12)
R2: Ch 3 and dc into the same stitch and 2 dc in each of the stitch and sl st at the top of ch 3 (24)
R3: ch 3 and dc in the same stitch and *dc in next stitch and 2 dc in next st* rep ** and join with sl st at top of ch 3 (36)
R4: ch 3 and dc in the same stitch, *dc in next 2 stitch and 2 dc in next* rep** and join with sl st at top of ch 3 (48)
R5: ch 3 and dc in same stitch, * dc in next 3 stitch, dc inc in next * rep ** and join with sl st at top of ch 3 (60)
R6: ch 3, dc in the same stitch, *dc in next 4 st, 2 dc in next stitch* rep ** and join with sl st at top of ch 3 (72)
(Switch to green color)
R7: ch 3, dc in the same stitch
, *dc in next 5 st, 2 dc in next st* rep ** and join with sl st at top of chain 3 (84)

Assembling:
Cut a small round of black felt for eyes and little seeds
Embroider the mouth and add a blush with small pink felt
Sew in the snap fastner inside of the crocheted piece

Your headphones are now ready to  be placed in the new watermelon holder. I'm sure this holder will avoid the headphones from getting tangled and will make your life a little easier. It's easy to carry on your bag too.


Hope you enjoyed this DIY. Have a fabulous day everyone!


DIY paperclip bookmark

Paperclips always come in handy to bookmark important pages in planners/ journals or any kind of books. There are many ways to decorate paperclips such as buttons, ribbons, washi tapes. Today let's make a cute paperclip bookmark using felt material. Keep reading below on how to make them.


Materials needed:

1. Felt material in pink,black and another color of your choice.
2. Paperclips.
3. Sewing thread and needle.
4. Fabric glue.
5. Scissors


Instructions:
1. Draw a cloud shape in a thick paper and use them as a template to draw and cut two pieces of cloud on pink felt.
2. Also cut 2 pieces of small circle in black for eyes and a little rectangle in color of your choice for bow.
3. Sew the back piece of cloud to the top of paperclip.Sew it nice and tight.
4. In the front piece of cloud, add eyes using fabric glue and embroider the mouth using black thread. Pinch the rectangular felt in middle and sew them on side of the cloud head. You can also add blush to cheeks by pasting dark pink felt cut in small circle.
5. Apply a generous coat of fabric glue on the clouds and join them together..


Now your paperclip bookmark is ready to adorn your books and notes. I made a bunch of these and send them to my penpals. Hope you like it. Have a fantastic new moth everyone.

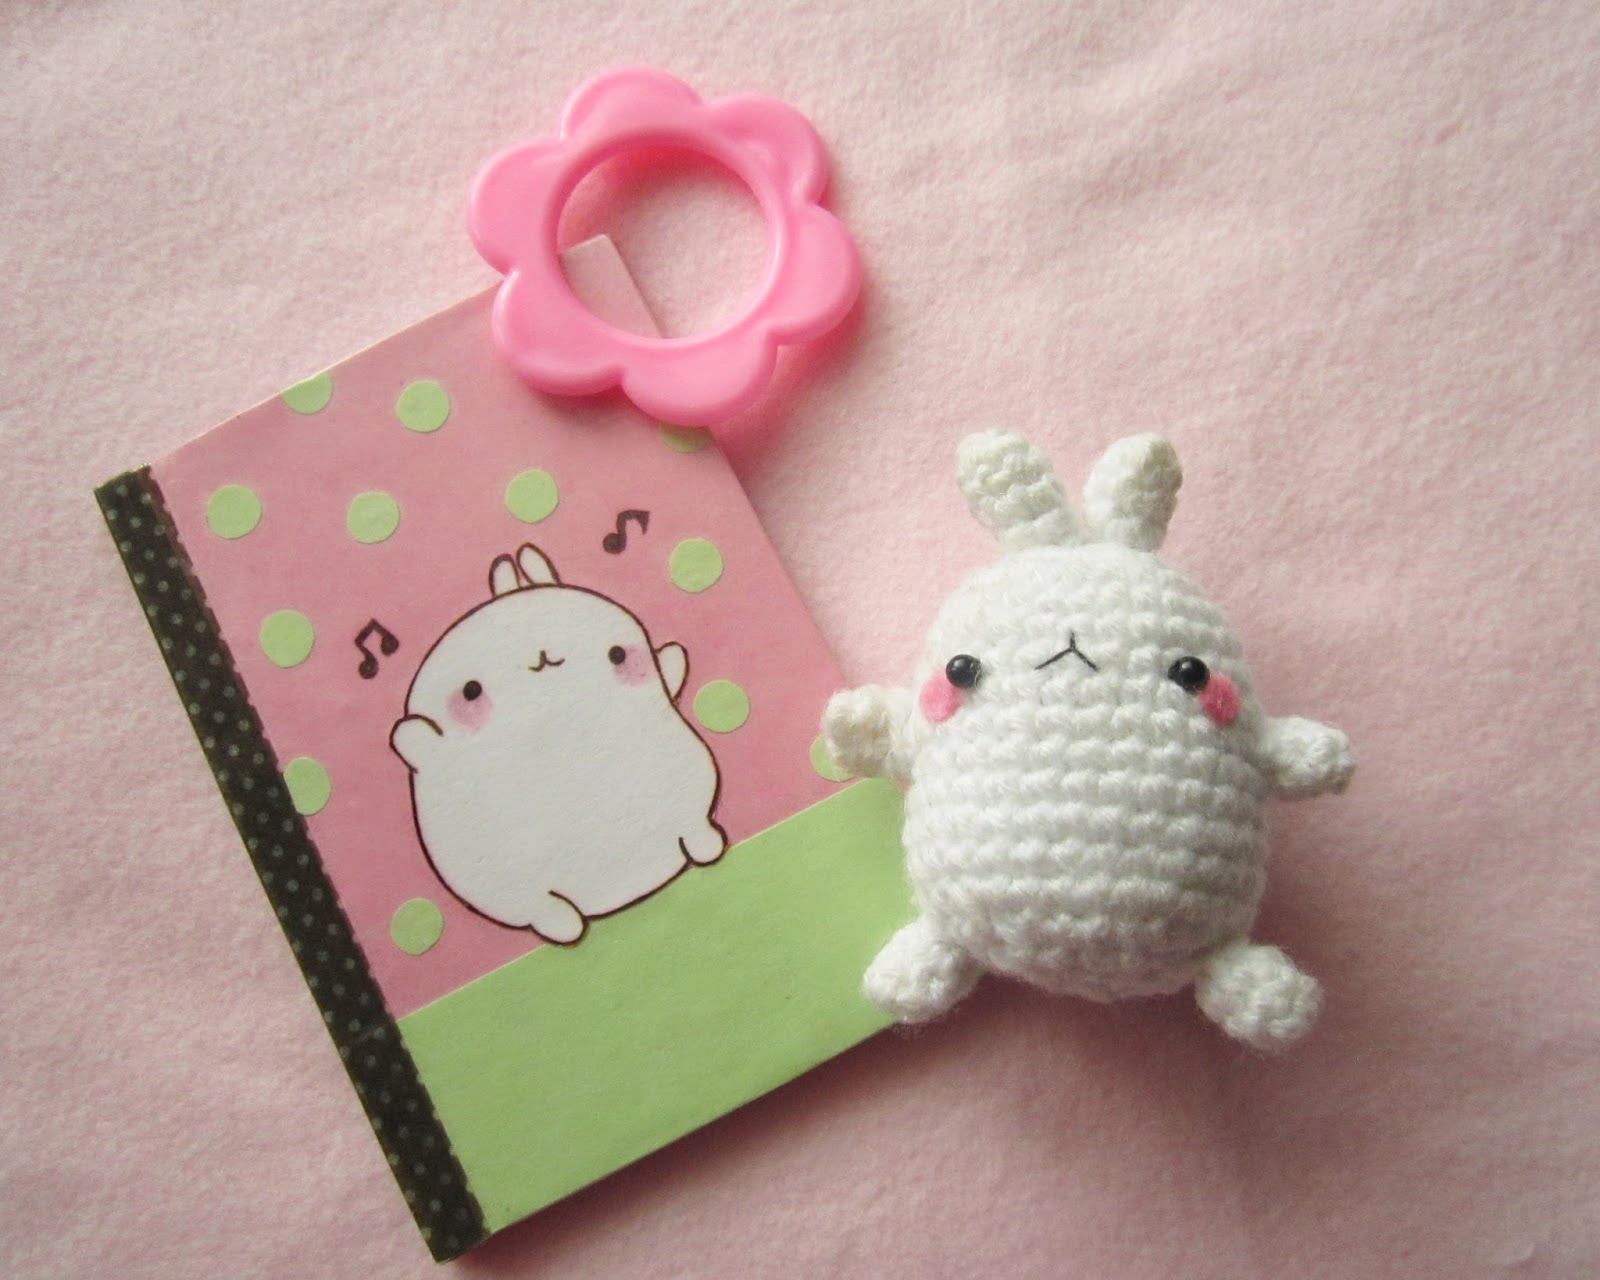
Molang Bunny free pattern

                                          It's the most wonderful time of the year..!!

December will always remain as my favorite month of the year. It's the season of joy and celebration. Christmas is all about sharing and spending time with your loved ones. It is also the time to show your love by giving presents to ones that truly matters. Here is a little Christmas Molang bunny pattern for you guys as a little Christmas present from me.


 Materials needed:
Acrylic yarn in white, red and green color
Crochet hook according to the size of your yarn
Black beads for eyes
Embroidery floss for mouth
Tapestry needle

This project is worked in continuous rounds unless stated otherwise
sc -single crochet
st- stitch
dec- one single crochet decrease
sl st - slip stitch

hdc - half double crochet

Head and body:
R1: 7 sc in magic ring (7)
R2: 2sc in each st (14)
R3:  *sc in next st, 2 sc in next st* rep **(21)
R4: *sc in next 2 st, 2sc in next st*, rep ** (28) 

R5-9:: sc in each stitch (28)

Switch to red color
R10-13: sc in each stitch (28)
Switch to white color
R14: sc in each stitch (28)  
R15: *sc in next 2 st, dec 1 in next st*, rep **(21) 

R16: *sc in next st, dec 1 in next st*, rep ** (14) 
stuff firmly
R17: sc dec in each st (7)Fasten off.

Hands: (make 2)

with white color yarn
R1: 5sc in magic ring (5)
R2: sc in each stitch (5)
switch to red color
R3: sc in each stitch (5)

 Legs: (make 2)
with white color yarn
R1: 5sc in magic ring (5)
R2-3: sc in each stitch (5)
 
Ears (Make 2)

R1: 6 sc in magic ring (6)
R2-4: sc in each stitch (6)

For shawl:
With grenn or red color yarn, ch 56.
Hdc in second chain from hook and Hdc in each of the foundation chains. 
Fasten off and weave in the ends
 

Assembling: 

Join hands, legs and ears to the body.
Add in black beads for eyes between row 7 and 8.
Embroider the mouth using black thread.
Add blush using little pink felt.
Wrap the shawl around the neck.
Your little Christmas molang is done! 


You can turn this into a cute christmas ornament by adding a little string at the head.


Hope you guys like making this. Cheers


Amigurumi Panda free pattern

Hello lovelies! Thanks for all the love you've shown to my Amigurumi teddy pattern. It's a joy to see people make amigurumi dolls out of that pattern and inspires me to create more. Today i'm here with a panda couple pattern. Head over below for instructions.


Materials needed:
Acrylic yarn in black and white colors
Crochet hook according to the size of your yarn
Little piece of black felt (for eyes and mouth) and pink or red felt (for bows)

Tapestry needle

This project is worked in continuous rounds unless stated otherwise
sc -single crochet
st- stitch
dec- one single crochet decrease
sl st - slip stitch

Head and body:
R1: 7 sc in magic ring (7)
R2: 2sc in each st (14)
R3:  *sc in next st, 2 sc in next st* rep **(21)
R4: *sc in next 2 st, 2sc in next st*, rep ** (28) 

R5: *sc in next 3 st, 2sc in next st*, rep ** (35)
R6-10: sc in each stitch (35)
R11: *sc in next 3 st, dec 1 in next st*, rep **(28) 

R12: *sc in next 2 st, dec 1 in next st*, rep **(21) 
R13: *sc in next st, dec 1 in next st*, rep **(14) 
stuff the head firmly with fiberfill and switch to black color 
R14: sc in each stitch (14)
R15:  *sc in next st, 2 sc in next st* rep **(21)
R16: *sc in next 2 st, 2sc in next st*, rep ** (28) 

switch to white color
R17-18: sc in each stitch (28)
R19: *sc in next 2 st, dec 1 in next st*, rep ** (21) 
R20: This step is optional. If you want a rounded body skip to R21. If you want your panda to sit then sc in back loops of each stitch (21) 
R21: *sc in next st, dec 1 in next st*, rep ** (14) 
stuff firmly
R22: sc dec in each st (7)Fasten off.

Legs: (Make 2)
R1: 7sc in magic ring (7)
R2-3: sc in each stitch (7)
fasten off  and leave a tail for sewing


Hands: (Make 2)
R1: 5sc in magic ring (5)
R2-3: sc in each stitch (5)
Fasten off leaving a long tail for sewing.


Ears: (Make 2)
R1: 6sc in mc 

R2: 2sc in each stitch (12)
R3: sc around (12)
Fasten off leaving a long tail for sewing.

Assembling: 
Attach both hands and legs to the body using tapestry needle.
Sew in both ears to the head.
Cut and paste a small black felt for eyes and nose in the head. 

Add a little felt or crocheted bows to the head (for female panda) or neck (for male panda)


Hope you guys like it. Have fun creating :)

Amigurumi Teddy bear pattern

Hello lovelies! I love making amigurumi dolls but i don't have enough patience to make larger ones so i always end up making little amigurumi projects. I guess there are people out there who, like me, would wish to make tiny amigurumi dolls that don't consume lots of time. Then this is a perfect project for you to try. These tiny bears measures only around 2.5 inches. Do go ahead and check out the pattern below to make these little teddy bears:)


Materials needed:
Acrylic yarn in colors of your choice
Crochet Hook according to the size of your yarn
Little felt for belly and mouth
Tapestry needle
Black beads or safety eyes
Black embroidery thread

This project is worked in continuous rounds unless stated otherwise
sc -single crochet
st- stitch
dec- one single crochet decrease
sl st - slip stitch

Head:
R1: 6 sc in magic ring (6)
R2: 2sc in each st (12)
R3:  *sc in next st, 2sc in next st* rep **(18)
R4: *sc in next 2 st, 2sc in next st*, rep ** (24)

R5-7: sc in each stitch (24)
R8: *sc in next 2 st, dec 1 in next st*, rep **(18)
R9: *sc in next st, dec 1 in next st*, rep** (12)
R10: *sc in next 2 st, dec 1 in next st*, rep ** (9)
Fasten off leaving a long tail for sewing.

Leg: (Make 2)
R1: 4sc in magic ring (4)
R2:  2 sc in each stitch (8)
R3-5: sc in each stitch (8)
fasten off  the yarn in first leg but do not cut off the yarn in the second leg.
Stuff both legs.


body:
Hold both legs together and sl st the second leg to the other one, 
R1: sc around (16)
R2: sc around (16)
R3: *sc in next 2 st, dec 1 in next st*, rep ** (12)
R4-5: sc in each stitch (12)
R6: *sc in next 2 st, dec 1 in next st*, rep ** (9)
Fasten off and sew in the edges.

NOTE: after stuffing, the legs will seem to be slightly apart (like inverted v shape). In order to make the legs together, with the remaining yarn from the first leg, sew both the legs together at the inner side. This will give a nice finished look)

Hands: (Make 2)
R1: 4sc in magic ring (4)
R2: *sc in next st, 2sc in next st*, rep ** (6)
R3-5: sc in each stitch (6)
Fasten off leaving a long tail for sewing.

Ears: (Make 2)
6sc in mc
Fasten off leaving a long tail for sewing.

Assembling: 
Sew the head to the body and attach both hands to the body using tapestry needle.
Sew in both ears to the head.
Cut a small oval shape felt and glue it to the body.
Cut 2 small half circle felt and glue it to the inner ears
Cut another small oval shape for snout and embroider the mouth and nose to your liking.
Sew in eyes closer to the snout using small black beads.

Note:
Alternatively, you can crochet small oval shapes for the body and snout instead of felt.
Your little teddy bear is done!


Attach a small thread or lanyard at the top of head and your teddy can be used as keychain or bag charm.
Hope you guys like the pattern. Have fun craftting!


Strawberry plush

I admit it!! I've been too lazy to craft or post on my blog these days.. Sometimes it feels good not to do anything and just relax reading a book or watching your favorite show. Well, at least that's the excuse i say myself for ignoring my blog at times ;)

Here's a little strawberry felt key chain that i made recently. You can whip up lots in a short time as these are very easy to make. Tutorial for this available here. I added eyes for a cute look and used stones instead of beads for the seeds.


 Hope you like this little fun project. Happy crafting!!

Baymax amigurumi pattern

Recently i watched Big hero 6 and fell in love with Baymax. well, who wouldn't love this huge marshmallow like robot that gives cuddly hug whenever one feels down. After watching that movie, i wanted to make an amigurumi version of it. It's just a tiny one but i managed to make it with a pattern of my own.. yay!!  So do go ahead and check out the pattern if you'd like to make one for yourself :)


Materials needed:

Acrylic yarn - white.
Crochet Hook - suitable size according the yarn ( i used sport weight yarn and 2.5mm hook)
Black embroidery floss (for mouth and eyes)
Tapestry needle.
Polyfiber fill.
safety eyes (optional)
Red and black felt (optional)

sc- single crochet

st-stitch
dec- single crochet decrease
This project is worked in continuous rounds

Head and Body:

R1: 6 sc in magic ring (6)
R2: 2sc in each st (12)
R3: *sc in next st, 2sc in next st*, rep ** (18)
R4: *sc in next 2 st, 2sc in next st*, rep ** (24)
R5: *sc in next 3 st, 2sc in next st*, rep ** (30)
R6-8: sc in each stitch (30)
R9: *sc in next 3 st, dec 1*, rep ** (24)
R10: *sc in next 2 st, dec 1*, rep ** (18)
R11: *sc in next st, dec 1*, rep ** (12) (now stuff the head tightly)
R12: dec 6 times (6)
R13: 2sc in each st (12)
R14: 2sc in each st (24)
R15: *sc in next 3 st, 2sc in next st*, rep ** (30)
R16: *sc in next 4 st, 2sc in next st*, rep ** (36)
R17-20:  sc in each stitch (36)
R21: *sc in next 4st, dec 1*, rep ** (30)
R22: *sc in next 3 st, dec 1*, rep ** (24)
R23: *sc in next 2 st, dec 1*, rep ** (18)
R24: *sc in next st, dec 1*, rep ** (12)
R25: dec 6 times (6)
stuff the body tightly with fibre fill.
fasten off.

Hands: (make 2 )

R1: 6 sc in magic ring (6)
R2: 2sc in each st (12)
R3: *sc in next st, 2sc in next st*, rep ** (18)
R4: *sc in next st, dec 1*, rep ** (12)
R5-6: sc in each stitch (12) 
R7:  *sc in next 2 st, dec 1 *, rep ** (9)
R8-11: sc in each stitch (9)
stuff just a little fibrefill at the bottom. 
fasten off and leave a long tail for sewing.

Legs: (make 2)

R1: 6 sc in magic ring (6)
R2: 2sc in each st (12)
R3-5: sc in each st (12)
Fasten off and leave a long tail for sewing.
Stuff the legs with fibrefill tightly.

Assembling: Attach the hands and legs to the body.
Embroider the eyes with black thread or use black felt.
Embroider the mouth as a straight line connecting 2 eyes with black embroidery floss.
If you wish, stick a tiny felt heart with fabric glue to the body.
And your little baymax doll is done!!!


Hope you like the pattern and do let me know if there is any corrections.. Happy crafting! Cheers :)


More plushies..

Happy July everyone!! The holy month of Ramadan started last month and will continue till mid july. It's one of the important festival that UAE celebrates. The city comes alive at night time with shops and malls opened till late night and specially made iftar buffets served in restaurants to break the fasting in the evening.. As for me, i'm confined at home during day time as it's too hot to go out and enjoys visiting malls and dining at night times.

well, onto my crafts, i've made some small plushies watching youtube videos and here they are..


Mochi felt plush made using tutorial from Sweetorials 

Baby octopus amigurumi

While many crocheters loves making blankets, scarfs and doilies, i always end up making cutesy little crochet projects and amigurumis. Guess the little girl in me likes cute stuffs and partly because i don't have enough patient to make big projects.

Here's a look at my baby octopus amigurumi that i made recently..


This is a free pattern from Berrysprite but i've modified a little for tentacles. It's very easy to make and can finish making it in less than an hour. I ended up making them in different colors and attached a tiny bow for a more kawaii look.

Update cookies preferences